No-Mess Crock Pot Yarn Dyeing
For the full color spectrum of Jacquard dyes visit our website.

Why learn to dye your own yarn? I’ll warn you ahead of time – it’s addictive! Author and fiber artist, Barbara Perry, dyes her own line of knitting yarn produced from the wool of her flock of sheep she raises on her 220-acre farm. “Creativity drives all fiber artists. Knitters, spinners, felt makers, weavers, rug hookers—we all pursue our crafts for the joy that comes from creating something that is personal, unique, and one-of-a-kind. Color is central to design in any fiber project. Hand-dyeing gives you the freedom to create color ways in your own personal aesthetic. The added bonus is getting to work with fibers and yarns of your own choice.” (Parry 5). Many fiber artists also dye their own yarn to save money or to match yarn to a current art piece.
After reviewing many articles and books about hand-dyeing yarn, I became overwhelmed. Because my research offered me so many choices, I didn’t know where to start. After procrastinating for months, I fell back to the simple no-mess crock pot dyeing method my alpaca farming neighbor had shared with me one sunny, warm day. Having practiced this method, I never tire of the many color-way possibilities nor do I tire of the need to share this method with anyone interested. I hope you will find my experiences inspiring to dye your own yarn soon.
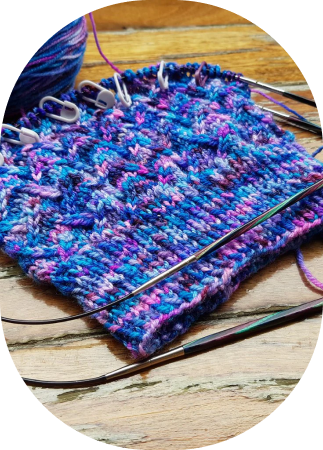
As you begin to think about what yarn you will choose to dye, please keep in mind you will need to find “hanks” of yarn that you can open up to lay in the crock pot for dyeing. If you choose a yarn that is already wound into a “skein”, you will simply have to make it back into a hank!
This photo shows my dyed hanks both wound up and flat in a circle next to a commercially wound skein of yarn. The yarn you choose to dye should be light in color (white or off-white). Alternatively, you can choose a pastel yarn that you want to drop a whole new set of stronger colors onto. Since we are going to use Jacquard’s Acid Dyes which give very vibrant colors, the yarn should be some combination of protein fibers such as wool, silk, alpaca, cashmere, or llama. My favorites are wool with a blend of silk or bamboo. These give a very nice feel when knitted, as well as produce distinct color arrays.

For the full color spectrum of Jacquard dyes visit our website.
The wide color assortment in the above photo gives you an idea of the color combinations you can try. In each crock pot batch, you will be able to dye 2 to 3 hanks of yarn using 2 to 3 dye color choices.
Some of you may be put off by the term “acid dyes”, but according to Jacquard, “Don’t be alarmed by the name, the only acid involved is the vinegar (acetic acid) that you add to the dye bath.” (Jacquard)
Once you have chosen your yarn and dye colors (the powders come in ½ ounce jars), these are the remaining items you should have handy: Dedicated 5 – 6 quart ceramic crock pot (you can’t use it for food again), 1 cup household white vinegar per batch, dedicated wooden spoon, plastic spoon, 1 cup glass measure, plastic gloves, paper towels, running hot water close by and 2qt – 1 gallon container to water soak your yarn.
To prepare your yarn for dyeing, inspect the “ties” that hold the yarn in place. Make sure they aren’t too tight and, if so, loosen them. Loosening them will keep “white” (undyed) spots from showing up in your dyed yarn. If you have a large hank, you might want to tie on 1 or 2 more scrap yarn ties to hold the main yarn in place. Once the yarn is dyed and ready to rinse, it can become very tangled and hard to handle without sufficient ties in place. You can’t have too many ties, as long as they are loose!
I would like to share a few pointers now about what not to do. Fortunately, it is difficult to fail when dyeing yarn using my no-mess crock pot method. So, after you have followed all the directions below, there are only a few reasons why you might dye yarn that you don’t like (not necessarily a failure in everyone’s eyes). While loading your pot, the most important temptation to avoid is: STIRRING THE POT! If you can’t resist and do stir the pot, you risk your yarn becoming muddy. If you stir, you might lose your vibrant color definition. The combination of the placement of the powdered dye with the controlled heat from the crock pot makes this method fool-proof and non-messy. Other methods require mixing the dyes in small containers before being added to a separate dye bath. A crock pot is then used after the dye bath with these other methods.
Another way to possibly fail is to not use a protein yarn. Other fibers will not take the acid dye – creating a very blah and muddy yarn no matter what color you pick. I did this early in my experimenting using a 100% bamboo fiber. It was so blah and ugly; I never let anyone else see it. I made sure no one saw me place it in my outside trash can. If you want to dye primarily bamboo, I would be very interested in knowing how you master this area of dyeing.
I would like to offer one last comment on choosing dye colors and then I will proceed with simple instructions for dyeing your own very personal yarn colors! Jacquard offers 40 acid-dye colors which seem to be very sufficient for lots of combinations. If you have studied color, you will probably enjoy choosing your colors based on the rules. If not, then simply pick 2 or 3 colors you would like to see “next” to each other, keeping in mind that whatever the 2 colors combine to – will create possibly 3 or 4 new colors. This is what truly makes dyeing fun. I think the only way you can fail in choosing your colors is to pick 2 colors that are already close to each other. When the dyes do their magic, they tend to blend and become kind of boring to many fiber artists. Soft, blended colors can be gorgeous but you might be disappointed if you want to see more of a contrast. So the rule is, especially when you are first experimenting, to pick colors that naturally contrast. I’ll let you be creative here.
Now you are ready to start. Fill your water container with cool water and your total yarn stash (2 or 3 skeins). Let them soak while you are getting the crock pot ready and dyes lined up. Start your crock pot on low and add the 1 cup of vinegar in the bottom. Have your dye jars lined up next to each other with their lids removed in the order you will be laying them across the yarn. If you are using 2 colors, for instance, you might alternate colors, using each color twice. Take your first hank and gently squeeze out most of the dripping water and lay it in the bottom of the pot in one of 2 ways for the whole batch: Make one big circle around the edge of the pot, crunching in the diameter of the hank toward the center – or – take the hank and fold it over itself once and lay it in the pot in a double circle. The 1st method makes more of a “striped” pattern with longer concentrations of each color. The 2nd method makes more of a “painted” pattern with splotches of color. You can try each method to see what you like but if you want your 2 or 3 hanks in your batch to match each other, you should use the same method for each batch.
Once you have your first hank lying in the pot, with plastic gloves on and using your plastic spoon, you can start with your first color and sprinkle about ¼ – ½ teaspoon in a vertical line across the pot starting on the left or right. Alternate vertically across with each color. Then do this again with the 2nd hank and the 3rd. DO NOT STIR, MIX, OR DISTURB. Also, at this point if you do use a bit too much dye, the worse that can happen is you wasted some dye. If the dye is too much for the fiber, it just stays in the water, wasted, but not fatal to your project. If you happen to not use enough dye, overall, then your colors will be a bit lighter, but not necessarily disappointing. Even if you get “white specs or splotches”, there are many yarn connoisseurs who believe this is a true sign of a “hand-dyed” yarn!
Once your hanks are all loaded and sprinkled, gently fill the pot with your hottest tap water. Use the wooden spoon to gently push down the yarn so it is all below the water level close to the top of the pot. The dye powder will seem to adhere to the spoon but gently drop the dye particles back into the pot by pushing the spoon below the water line. Cover and turn the pot to high for about an hour. Then reduce the pot to the low setting either overnight or for 4- 8 hours. You know you are done when the water color becomes clear. That also means you didn’t waste any dye! If the water still has color after 8 hours, you are done anyway and maybe wasted a bit of dye.
While your yarn is cooking – relax and continue working on one of your other projects! This is also a good time to document your process by writing down the yarns and dye choices for each batch. If you keep a photo in your log, that will also remind you of your results. I usually enjoy all my batches, keeping track of every one, but you might come upon an amazing color way that you want to repeat. The more details you record, the better chance you have of duplicating your batches. If you are anxious to see your cooking yarn, you can open the lid any time and see how much color is still in the water. Once you know it’s done, just turn off the pot and let the yarn cool until you can handle it. Then drain your pot, rinse the yarn with cool water, squeeze dry, and hang your hanks up to drip dry. I love doing this on a clothes line outside in nice weather or in cooler weather inside in the shower. Don’t be disappointed – as the yarn dries, the colors start turning more vibrant! You can expect to become attached to this yarn you’ve colored yourself – while it’s drying! By the time it’s dry, I am usually doing two things – planning what I will knit up from this batch and planning my next yarns and colors to dye. And the addictive cycle continues.
While this method might seem somewhat simplified for the avid yarn enthusiast, you now have a great process to further experiment with dyeing. Here are just a few ideas of where to go from here: Mixing dyes and hand-painting your yarn, dyeing a silk scarf blank in the same pot to match your yarn, dyeing roving along with your yarn, and continuing your research to use more natural dye compounds.
For the full color spectrum of Jacquard dyes visit our website.
Works Cited:
Parry, Barbara. Teach Yourself Visually Hand-Dyeing. Hoboken: Wiley Publishing, 2009.
Jacquard Acid Dyes: http://www.jacquardproducts.com/acid-dye.html